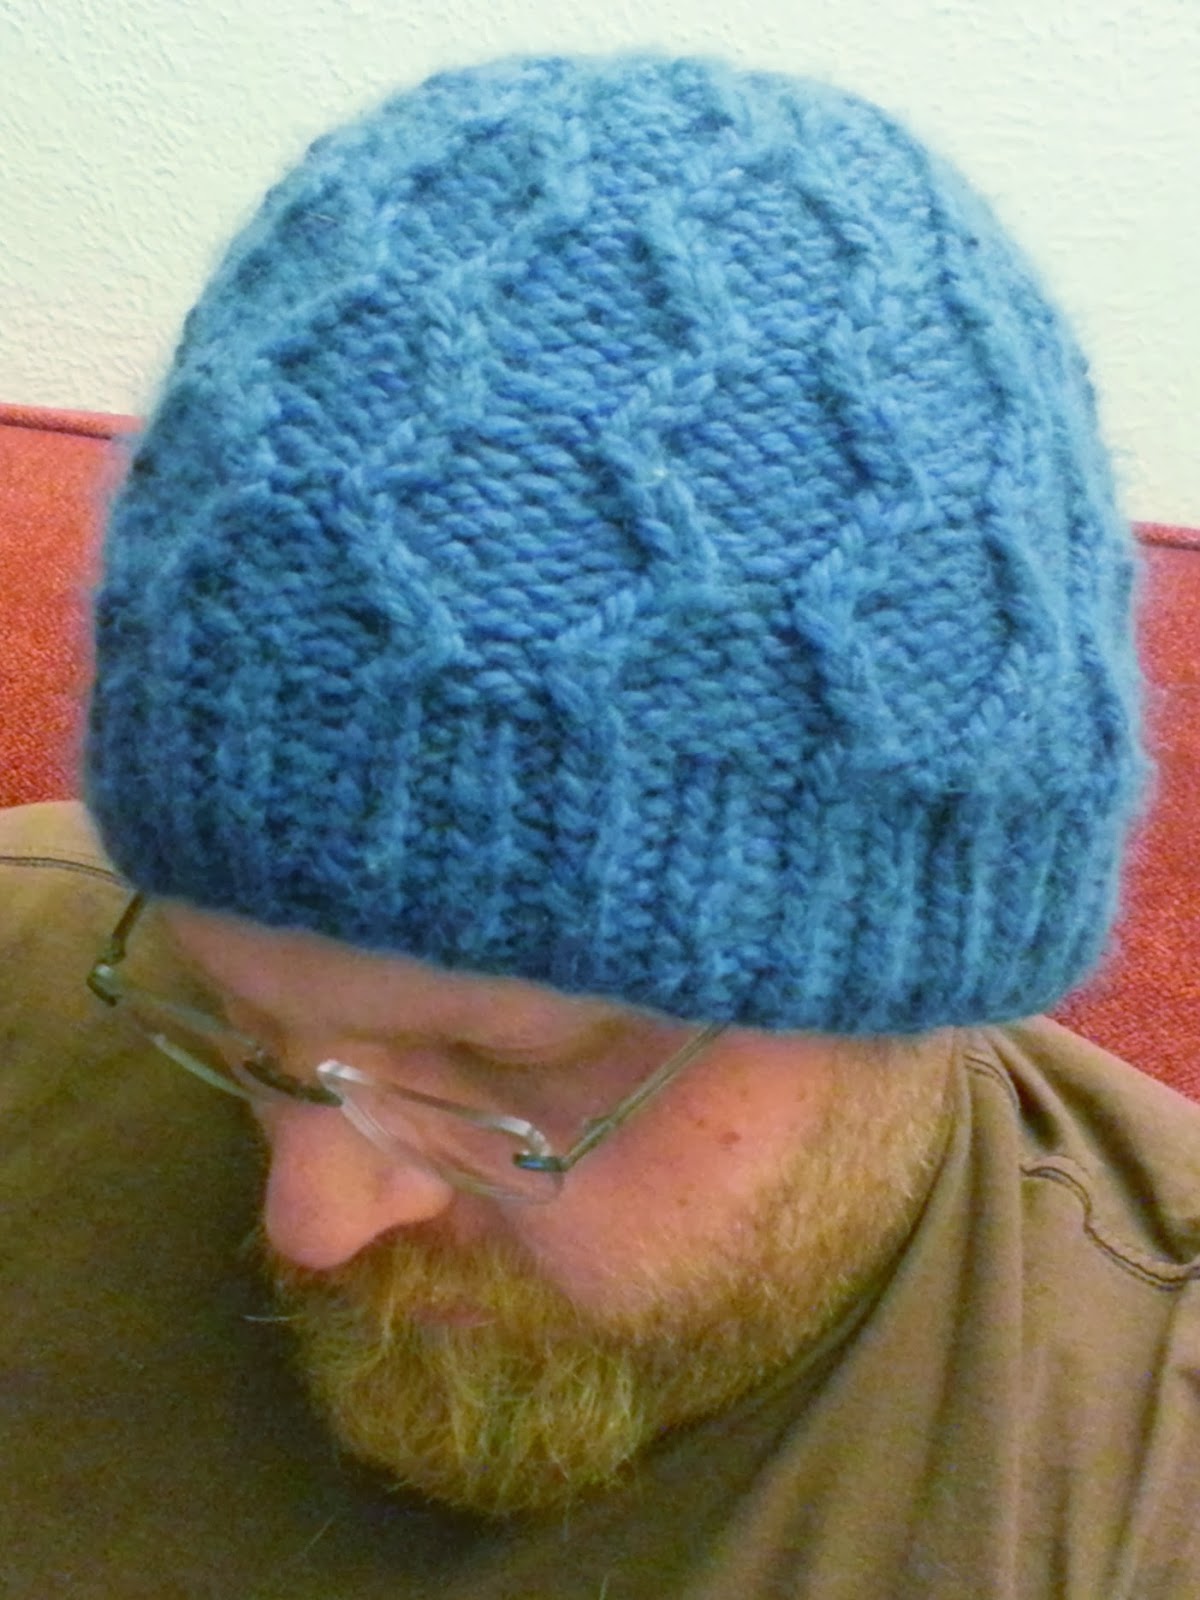
I designed this hat as a last minute Christmas gift in 2012 and it has become a family favorite. My brother, sister-in-law, husband, and mother each have one. I also wear one sometimes, when Willow (the toddler) hasn't stolen it (it's one of her favorites too) and I've sold a few. In a bulky yarn, it's a quick, easy knit and one size really does fit most people, toddler through adults. It's a slouch style on toddlers and more of a traditional stocking cap on adults. The diamond pattern is a simple variation on left and right twists, the only difference being that in each twist one stitch is knit and the other is purl (instead of both being knit st as in traditional LT and RT)
If you make this pattern, please send me a picture or link to your own blog, ravelry, or facebook post so I can see how it turned out! This pattern is for personal use only and not for resale.
If you aren't a knitter and wish to custom order a hat in the color of your choice, please contact me here or at moderncrafter.etsy.com.
Also, if you follow the pattern, please leave me any feedback or corrections that will help improve the pattern for future users! Thank you!
1 skein of Brown Sheep Lamb's Pride Bulky Superwash (110 yards/100g) or similar weight yarn
size 11 needles (one set double pointed and one set 16" rounds, or just the double pointed)
cable needle*
yarn needle
*Note for experienced knitters: I don't use a cable needle for this pattern since only 2 st change places, preferring to just slip both stitches off the left needle, put them back on the left needle in the correct order (careful to put the knit st to the front) and then working the stitches in pattern. (K the k and p the p)
Gauge
12 st x 16 rows for 4"x4" on size 11 needles in stockinette stitch
Abbreviations
AR (angle right) = slip next stitch (always a purl stitch) on to the cable needle and hold it to the back of the work, k1, then p1 from cable needle
AL (angle left)= slip next stitch (always a knit stitch) on to the cable needle and hold it to the front of the work, p1, then k st from cable needle
Notes
It has lots of stretch but, if for some reason you are making it for a head larger than 24" around, add another repeat of the diamond pattern by casting on an additional 8 stitches.
If you need it longer than written (probably only necessary for a large man or someone who wants it very long over the ears), continue even in the diamond pattern to desired length, ending with Diamond Pattern Row 6.
Instructions
Cast on 72 st and join in the round.
K2p2 rib for 10 rows
Next row, set up for diamond pattern: p2, *k1, p3* to last 2 st, k1, p1
Work Diamond Pattern (see below) for 14 rows, ending after Row 6
Next row (Row 26): *p2, k2tog, p1, ssk, p1* to end (54 st left)
Row 27: *p2, k1, p1, k1, p1* to end
Row 28: *p1, k2tog, p1, ssk* to end (36 st left)
Row 29: *p1, k1* to end
Row 30: k2tog for 18 times (18 st left)
Row 31: k2tog for 9 times (9 st left)
Cut yarn, leaving long tail and use yarn needle to thread tail through remaining stitches two times, pull tight,
Weave in ends
Diamond Pattern
Row 1: *p1, AR, p3, AL* to end
Row 2, 4, 6, 8: Knit all knit stitches and purl all purl stitches
Row 3: *p1, AL, p3, AR* to end
Row 5: *p2, AL, p1, AR, p1* to end
Row 7: *p2, AR, p1, AL, p1* to end

3 comments:
Thank you for the pattern!
Thanks for the pattern it was very easy to follow and very fun to do. I added a entire diamond sequence and it turn out perfectly
Thanks for the pattern it was very easy to follow and very fun to do. I added a entire diamond sequence and it turn out perfectly
Post a Comment